This article is from SEP 30, 2021 and was written for Game Art Blog. I'm posting it here because the Game Art Blog was shutdown.A lot of things like Tools, values and more have changed in my workflow since this article, I'm gonna do an updated article in the next months.
Hi! My name is Howel Ganuchaud. I'm a freelance Environments & Weapons artist from France.
Today, I would like to talk about weapons texturing in-depth. Some ideas and principles can be used for any props texturing, but I'm going to focus this article on weapons and how you can push that last 10% and reach that "godly" level.
Some context before starting. I love firearms. I'm not talking about the political side of firearms (good or bad). I'm talking about designs, shapes, materials, internal systems, etc.
Every time I watch a video about the internal system of a firearm, I'm always impressed by how "simple" and "complex" it is simultaneously.
For me, through the texture, you can tell a lot about what happened to the model. How old it is, what part of the world did it see, who's the owner, did he take care of it... those are some questions I'm trying to answer when I'm working on the texture.
Now, let's dive deep into it!
I. Decrypting Your References.
Extracting information from references can be tough at first, but the more you watch photos, the more details you see. Here are some examples of what I "see" when I take a look at weapons photos.
Even a "clean" / "new" weapon will have:
- Roughness scratches.
- Roughness variation.
- Color variation.
Used weapons will have:
- Edges wear (on located areas).
- Metal/Polymer Scratches.
- Height damage.
- Color variation.
- Roughness scratches.
- Roughness variation.
Rust = I want to make a quick point here, rust on a modern firearm is "rare." It's not because you want to make a post-apo gun that you NEED/SHOULD put rust everywhere. We will see a bit more of that in the PBR Knowledge section.
These are two examples of how I decrypt my references:
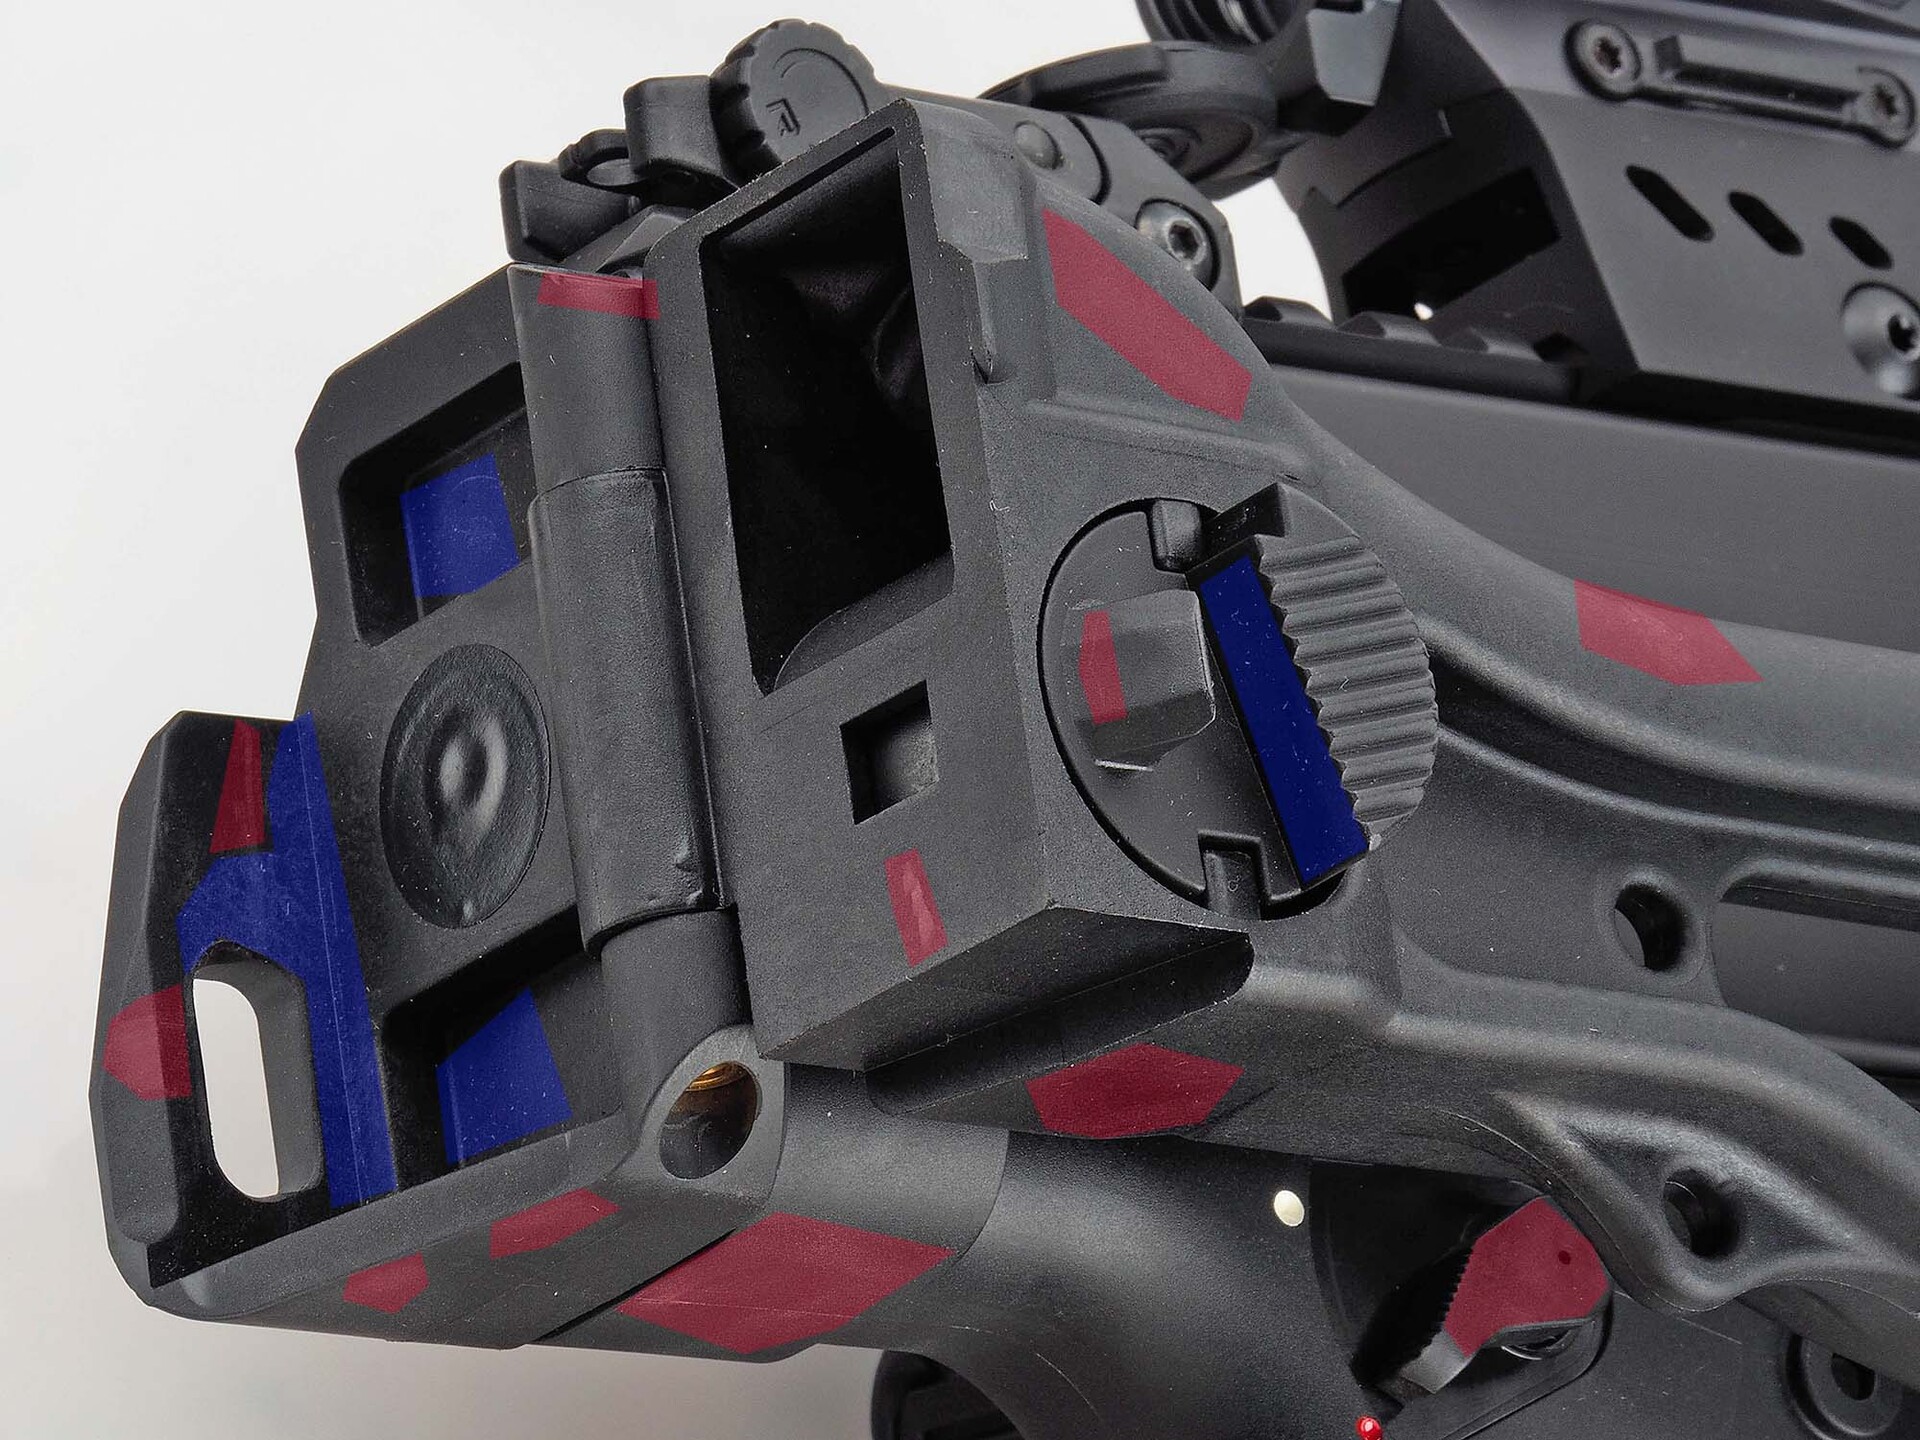
- That part of the gun is a polymer.
- Red: Colour variation, Roughness variation, scratches (color/roughness).
- Blue: Dust, mainly in AO areas.
In the example below, the same principles applied.
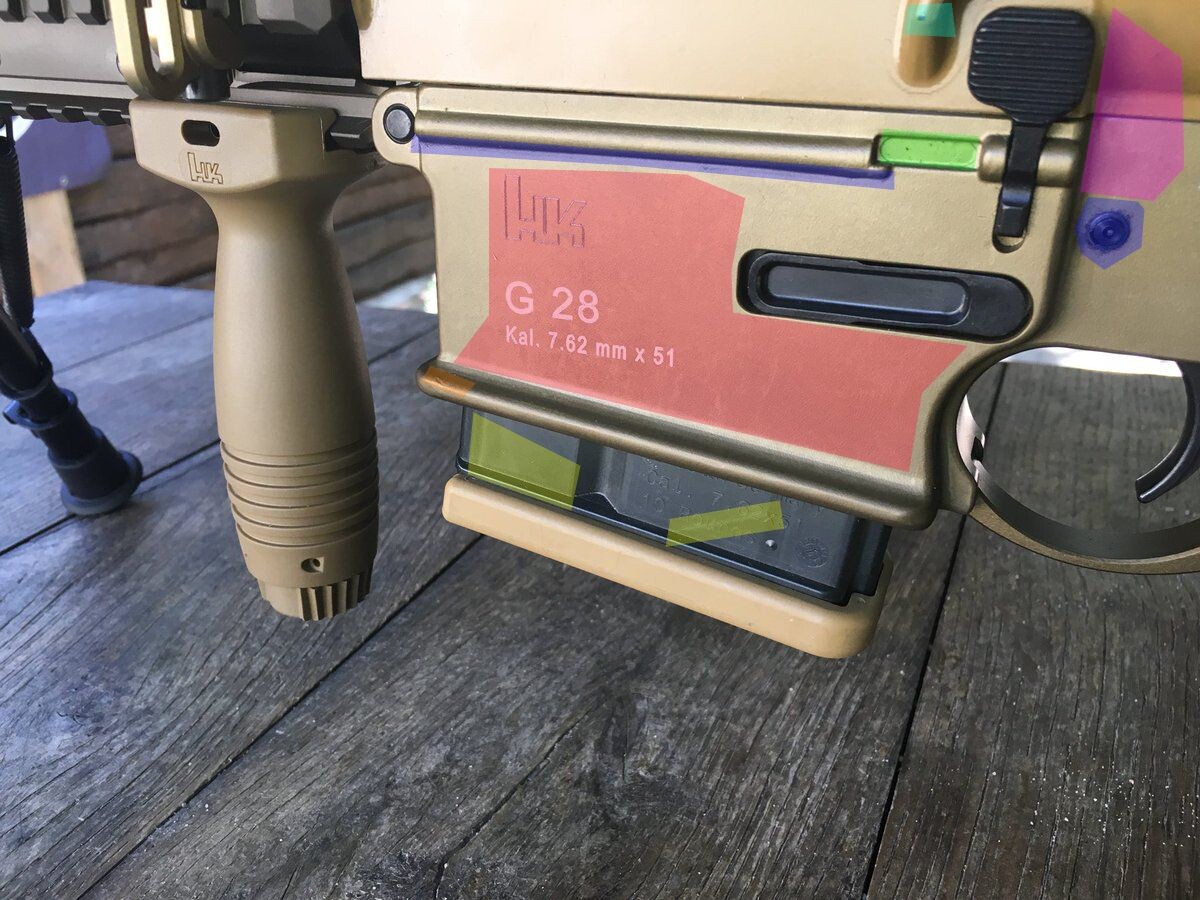
- Red: Color/roughness variation.
- Green: Dirt points.
- Orange: Height damage.
- Yellow: Roughness scratches.
- Blue: AO dirt/dust/grease.
- Pink: Colour / roughness variation.
- Cyan: Edge damage.
You can find the albums with more decrypted refs here and the original photos here.
II. Understanding How Guns Are Made.
Now, you need to understand that "modern" firearms (not WWI / WWII or before) will always have the same materials. Some variations through manufacturers, models, types of firearms, will exist but you will generally have the same surfaces.
What does that mean exactly? It means, for example, that if you are working on an AR15 and reach a realistic texturing, when you move to another modern gun, you will still be able to apply your knowledge to this new gun because it uses the "same" materials.
You will have to figure the moving parts, what areas would touch a surface if the gun falls on the ground, the shooter uses a wall to hold the gun, etc ... But you will win a lot of time because you already know how to make this model looking realistic and good. You will have a good base to start with.
We will look at how you can use those extracted pieces of information in Substance Painter later.

It’s been a long time since I wanted to save & share all the photos I grabbed those last few years and create something to help other artists.
I didn’t know exactly how to do that. Then, I talked about it with Jeremy Estrellado (Lead Environment Artist at Ubisoft Massive, Dinusty Empire Founder), and the idea of using Notion for that came out.
After some work, the WEAPONS LIBRARY was born!
This is a notion’s page that references a lot of weapons. We just released the first version, so you don’t have all the weapons (yet 😉), but the idea is to provide a good, high-res photo base for each weapon.
You can pick just the photos you want/need or download the complete album (.rar file). Also, if you want to participate in this project by sending some high-res photos, you can contact me on Artstation, Twitter, or discord (Defcon#3216).
III. PBR Knowledge - How Does a Material Work in Real Life?
"Learn about PBR" - "You need to check more about PBR" - "PBR Knowledge is really important, go check it out" I heard that a lot of times, and every single time I ended up on the Substance Painter documentation page, where they explain how PBR works and every single time I was like "How that stuff is relevant ? I know how PBR tech works".
It took me a long time to understand what people meant here. That's why now I'm saying "Real Life Materials."
This section will talk about how materials work in real life and why you should learn about them.
I know you want to jump into the painter stuff and learn some tricks to achieve that super realistic texturing. Trust me, I know, but I would have loved to understand that stuff earlier. It will help you achieve that texture level.
First, for metal parts, I really recommend you to watch the following video multiple times.
Then for Polymer parts, you have the following article:
https://www.hubs.com/guides/injection-molding/
And the following video:
Unfortunately, I couldn't find any gun parts molding videos. But it's based on the same process.
Long story short, at the beginning of 2021, I was working on my MP5. I posted on The Dinusty Empire Discord to get some feedback.
I got some cool reactions. I was happy. Then, Jeremy Estrellado told me that I was missing that last 10 percent, and he recommended I look at how materials were working in real life. I can't thank him enough because, after that talk, I found the video I shared above, and it was life-changing for me.
Before that video, my texturing workflow was simple. Weapons use metal, black or TAN metal, so I'm using painted metals materials. That was the mistake. Firearms don't use painted metal. It's coated metal.
This is a great page that I recommend to understand the materials as well.
https://www.wingtactical.com/common-gun-coatings/
Some great examples of recapping the different levels of the part of a firearm:
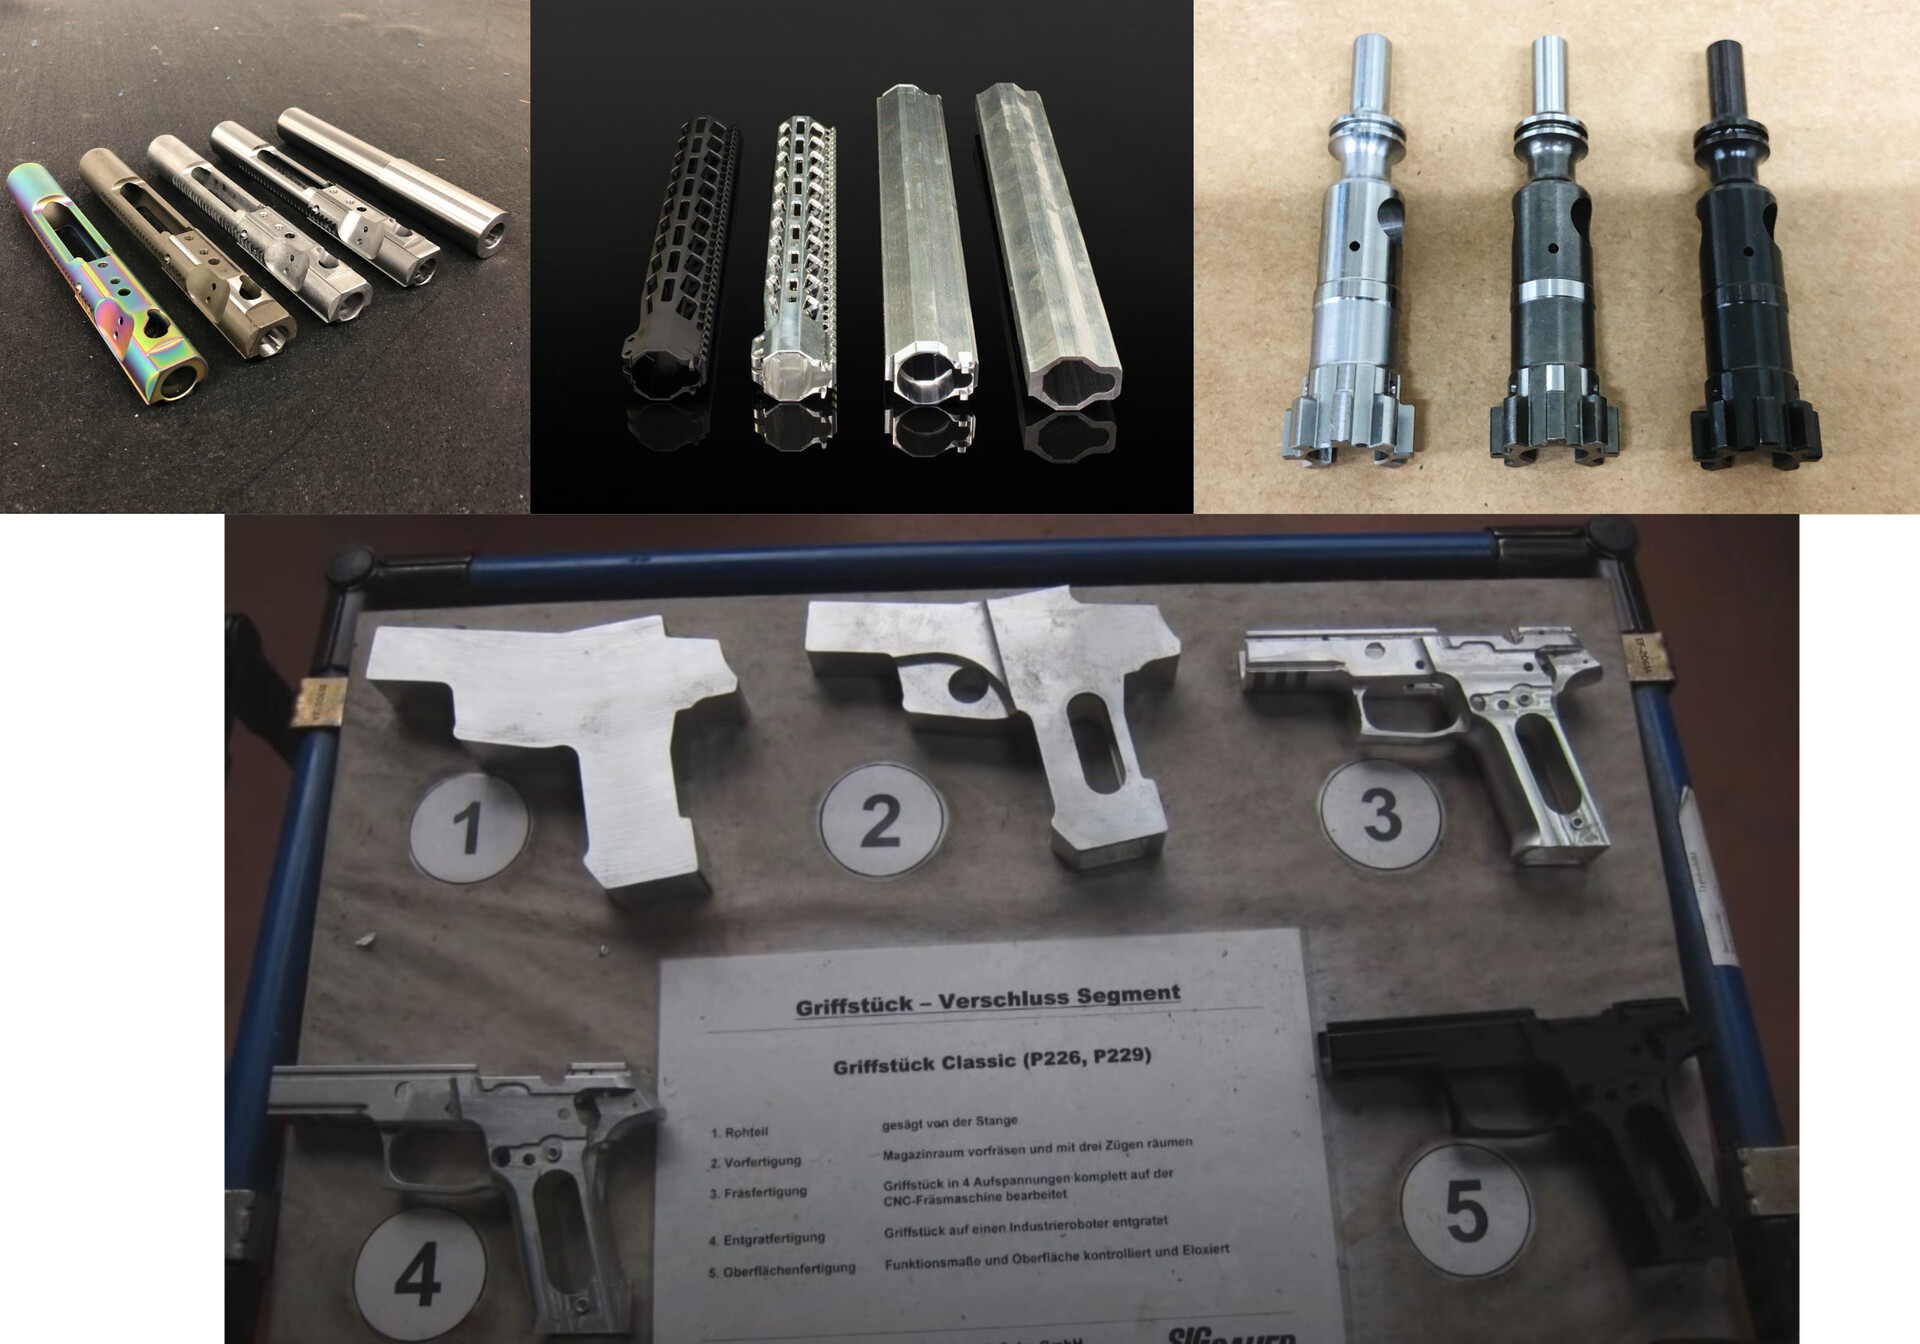
To recap:
- Guns don't use painted metals (stop using them).
- Learn about how something is made when you want to reproduce it in 3D.
- Guns are mainly raw metallic parts until the very end of the production.
- The coating is multiple layers that cover the entire part to protect the metal from the different elements (this is why a gun will rarely be rusty).
- You need to understand that the coat is really thin compared to a painted metal where you will have that "height" in the scratches or damages. You will barely have that height effect on a modern firearm.
IV. How to Use the Extracted Information in Substance Painter.
Now that you know how to extract pieces of information from your references and how the materials of firearms work in real life, let's dive deep into Substance Painter and learn how to create those details.
For me, texturing is the most important part of model creation, at least for a realistic model.
Before starting, I recommend you to check those two free Artstation's courses:
- Creating and Texturing with Custom Stencils by Rick Greeves.
- Substance Painter: Pushing Your Texturing Further by Jason Ord.
These are two major courses, a lot of important stuff there. Go check them out!
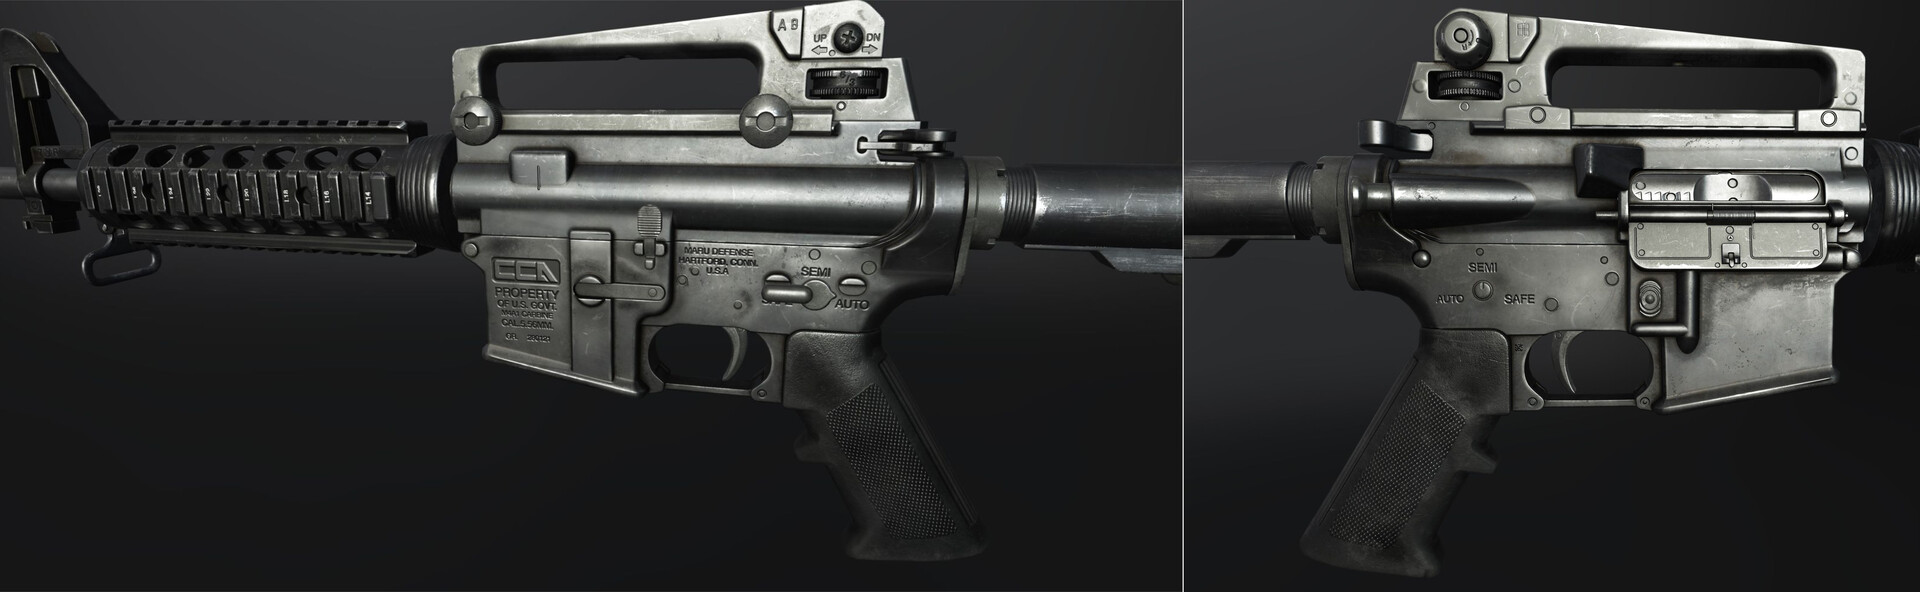
Bellow, you can see my M4 model in substance painter. You can compare some references I shared above with my texture. You will see some similitudes, especially for all the small details.
This model was going to be used in UE4, so I used the ACES LUT made by Brian Leleux; this is why the model looks more contrasted than the default painter's viewport.
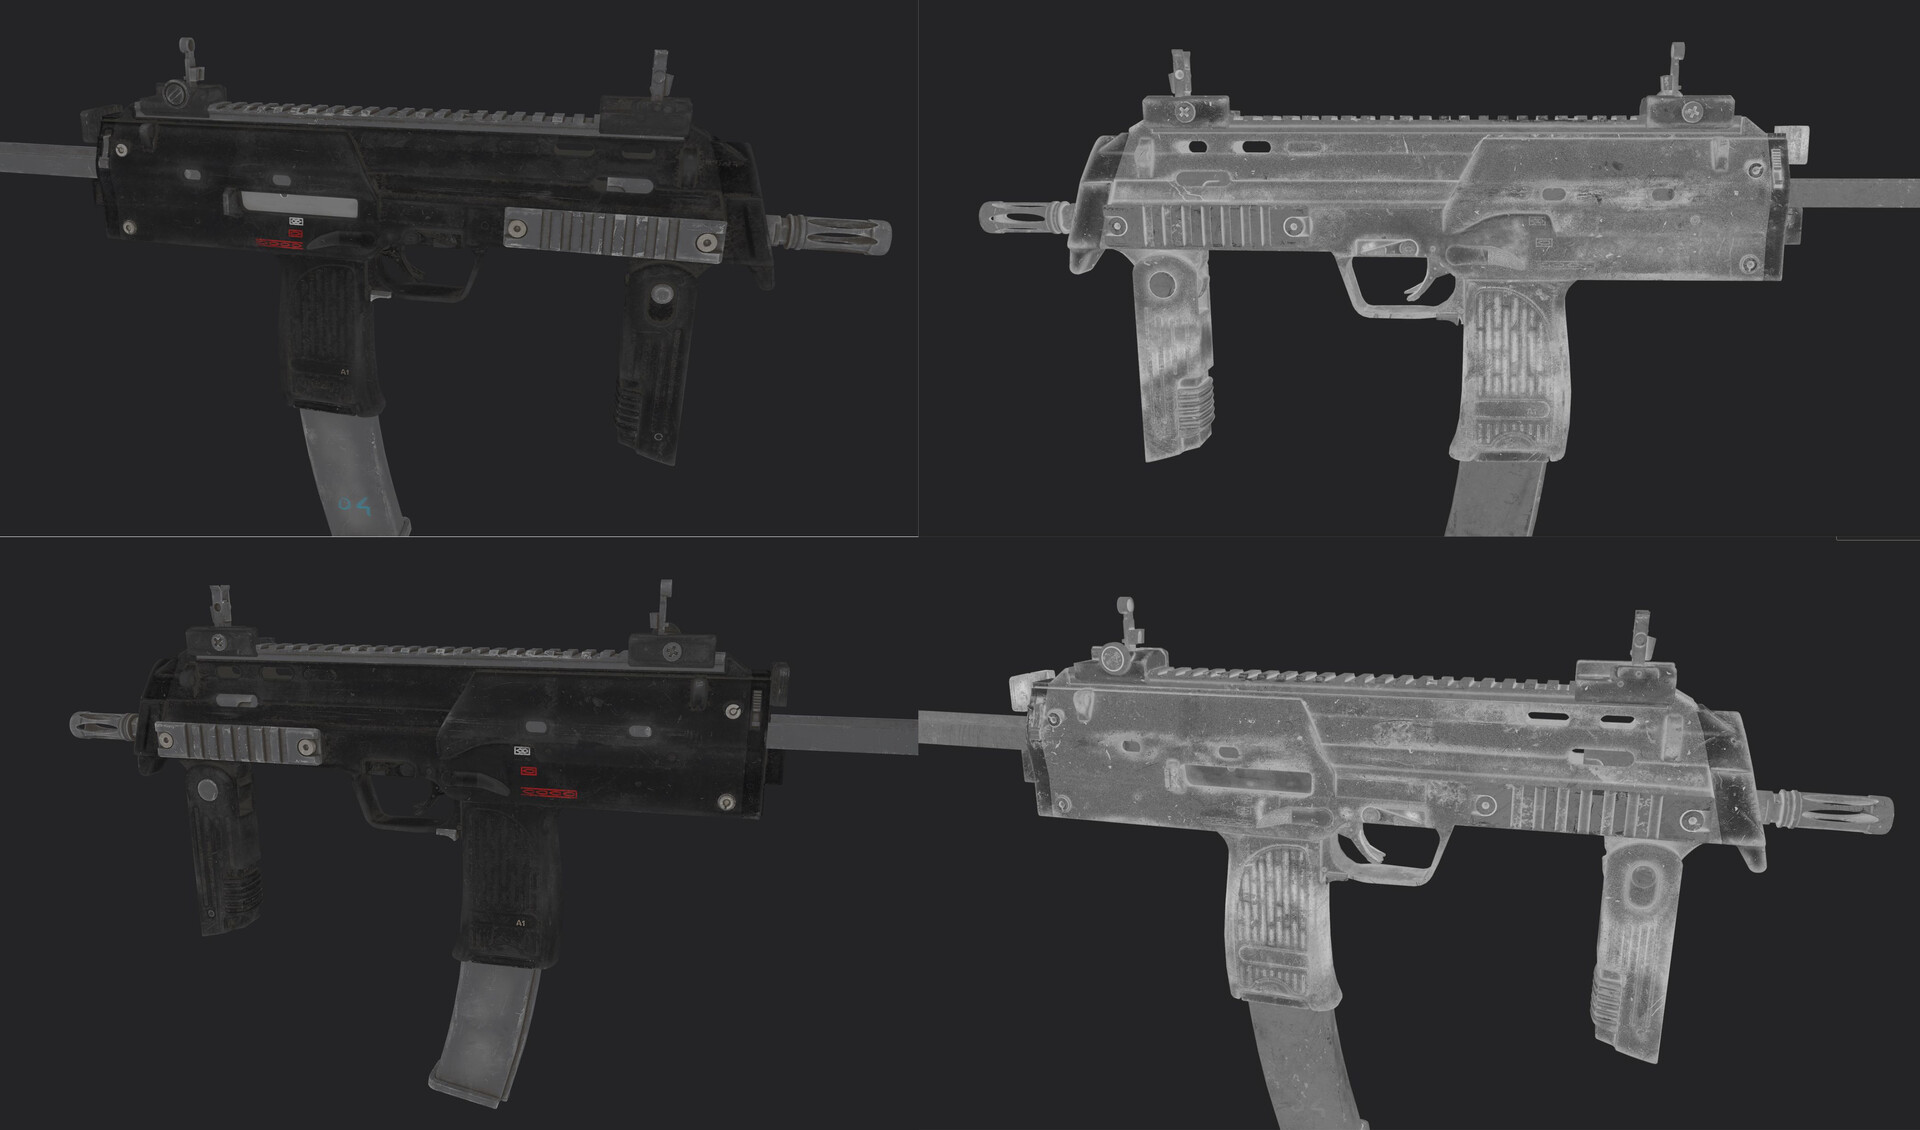
The color map screenshots are here mainly to show you all the small details I put in the textures.
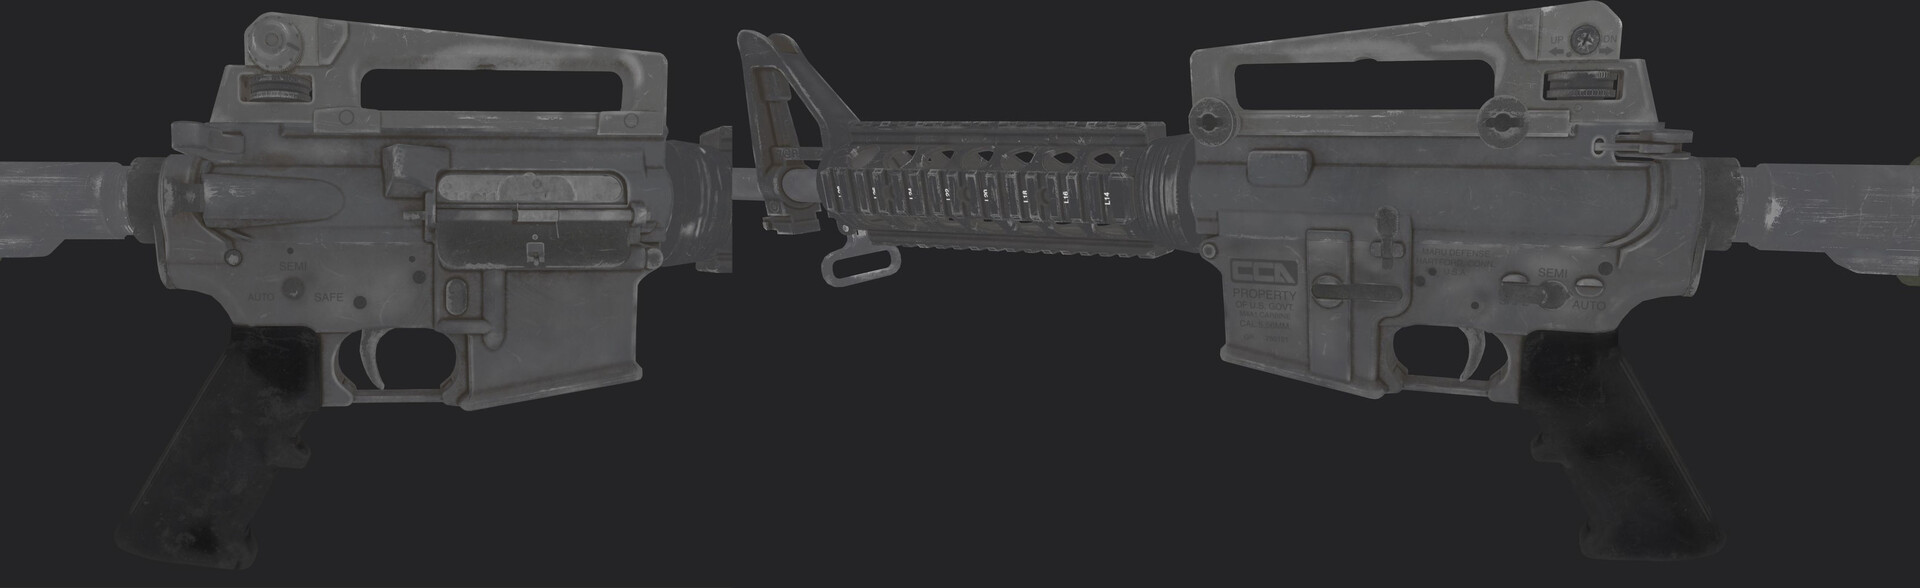
There's a lot of color variation here, especially around the moving parts and the hands' placement. All the "real" metallic wears are on specific areas (mainly those touching the different surfaces first). It can be a bit strange in these photos because some areas look really white. It's not directly edge wear, but edge highlights.
The roughness map is the most important texture when you're working in PBR. You need a good variation through your materials to make it real.
This is where the interesting thing starts. You will see that my small white/gray scratches and details, in general, are inside the colormap and the roughness, not the metallic.

Why did I do that? It's connected to the goal of this project. The client wanted a "clean" but not a "new" weapon, and he didn't want any damaged / post-apo version.
This is where I took the direction of "slight damages." It means that the weapon is used almost every day (probably by cops or the military).
It will take some hits, it will touch other surfaces (fall on the ground, touch a wall, touch some parts of a plate carrier, etc...), but at the same time, it's not old or broken.
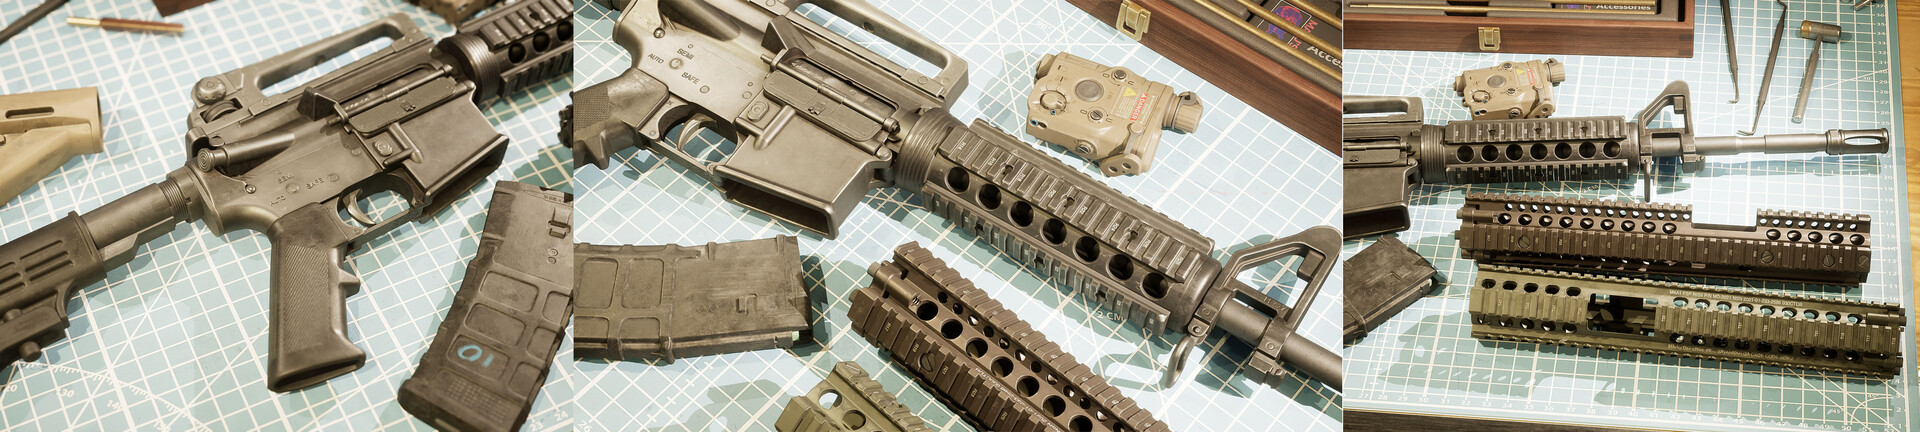
That's why most of my medium & small details are "slight" because it's not deep enough to cut through the coating. But it doesn't "kill" the effect. As you can see in the photos below, it works pretty well.
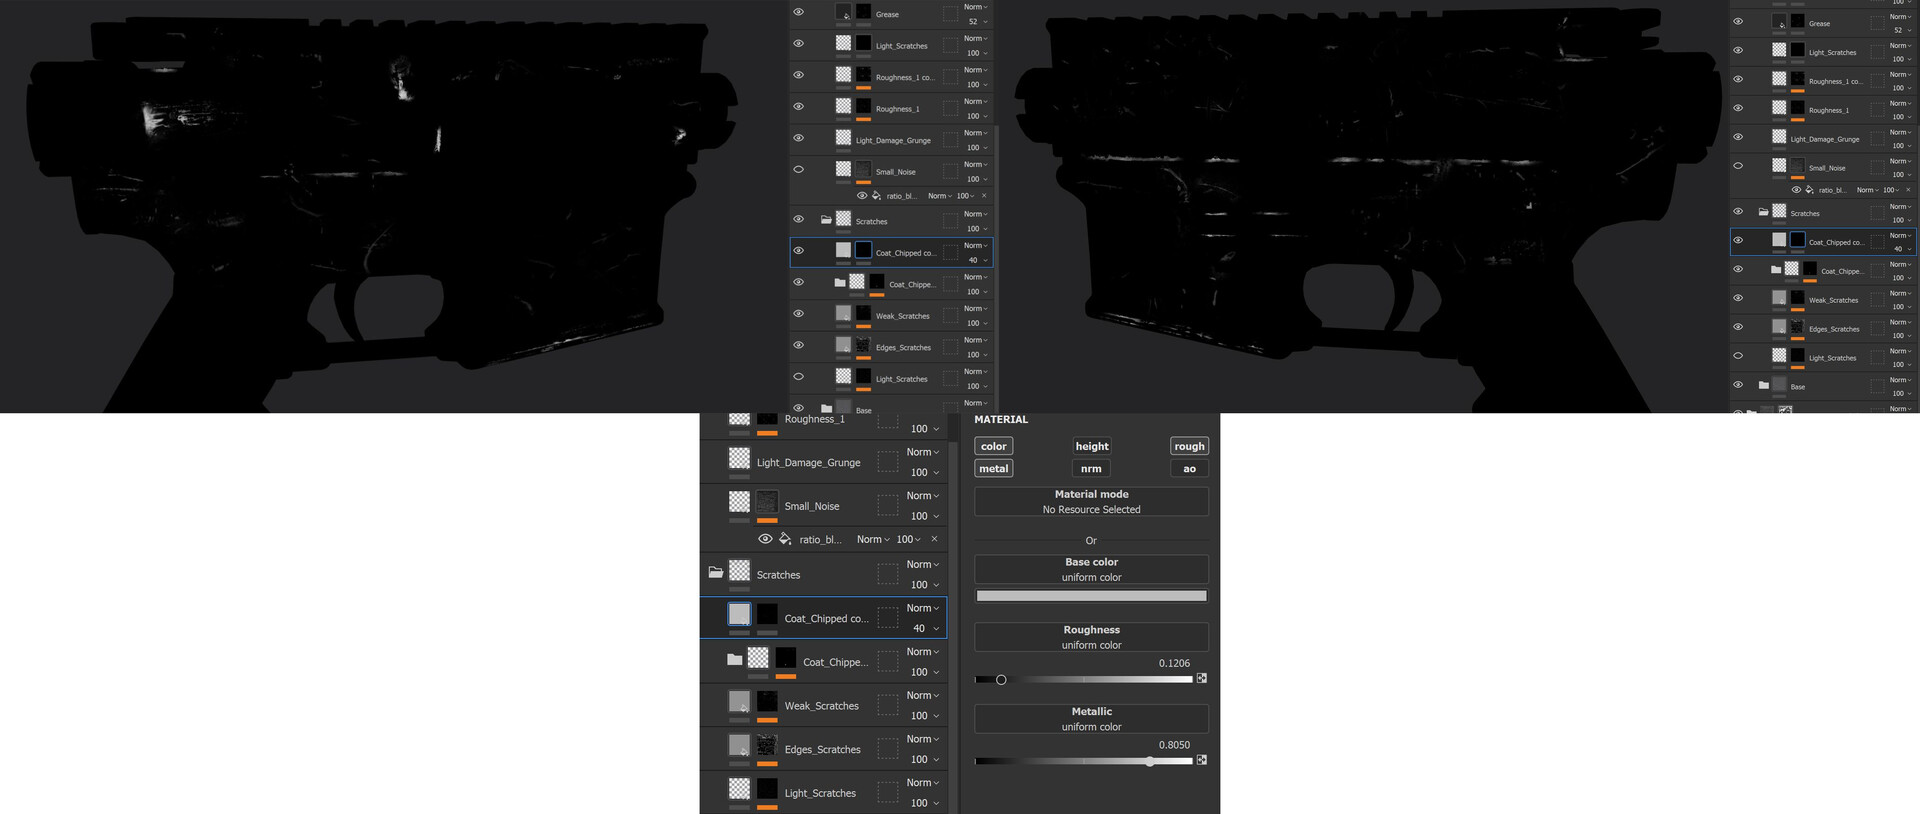
This is how I achieved those details. Nothing fancy here, just a simple layer with an opacity of 40% and some basic values. No generators. I did all those small details by using Stencils.
That's why I recommended those two Artstation courses. Both of them use Stencils intensively, and you should too if it's not already the case.
V. Polymer Materials.
I'm going to make a quick focus on the polymer here to show you how I work with those materials.

My polymer material is pretty simple, and I'm using the same "rules" as the metal material.
With a good breakdown of your references, you can see that a good color variation is really important before going into real height damages for polymer parts.
Try to focus on the color and roughness map first.

Those polymer materials are really tough, even tougher than metal sometimes. You need to understand that you will need a lot of weight & force to really damage those things.
That's why I said you should focus on color & roughness variations. Because if you look at some plastic objects around you, in your everyday life, you will see that plastic materials will have a lot of "used" areas, with discoloration.
Then, if you really want to add height damages, try to create "unique details" instead of using scratches everywhere. Just add some damage in one unique location. It will add some storytelling.

I'm using as a base the "Tactical Plastic" smart material. I don't remember if it's a default smart material of painter or part of that military pack they made some long time ago.
Then I'm adding all this roughness and color variation layers, some dust, and dirt. Don't forget to add a Sharpen filter at the top, with a value between 0.2 & 0.35. It will push your details a bit and kill that blurry effect that you can sometimes have.
That polymer smart material was "updated" a bit later during the texturing of the M4. I'm expecting to update it in the future the more I'm learning plastic materials (always learning).
Another cool tip, when everything is finished, you can add a paint layer that you put in "passthrough" on BaseColor, Roughness, Metallic, Normal, Height & AO(if needed), and then you paint on the UV seams cuts that you have somewhere on your model with the clone tool to hide them. It took me a while to learn this really cool tool.
I did some breakdowns of GIFs of the MP7 and the P320 M17 to show you the different layers.
To recap:
The "trick" I got in my backpack for my texturing is just a multitude of small things:
- A good understanding of how materials work in real life.
- I know how to extract pieces of information from my references.
- For every project, I know what kind of storytelling I want to achieve. If it's a brand-new gun without a lot of damages (P320 M17) or if it's a gun that has been used a lot and for a long time (MP5 / MP7).
- It's important to have some firearms knowledge to integrate "by who" it's used.*
- I'm using stencils intensively.
- Use smart materials. After every project, I save my smart materials (metals, polymer) for all my last weapons, and after each project, I improved them. I'm not saying they're perfect, but right now, it gives me a great base.
- The last important point, I'm looking for feedback all the time.
*Having some firearms knowledge help a lot, especially during the texturing time. By “firearms knowledge,” I mean how a firearm is carried, where the hands are, how it works to understand where the grease will be, those kinds of things. You can even push it further. For example, a special forces operator will not carry/use a weapon the same way a rookie handles it. You can integrate those levels of skills in the texture.
VI. Getting Feedback.
Doing art is not an easy job. You learn a lot from others, all the time.
I recommend you to look for feedback as soon as possible, don't wait to be at the end of your texturing phase. Ask when you're still in the modeling phase to see if you missed something if you are in the right direction.
Critiques or feedback are not only for the final model look or when you posted it on Artstation. It's for every stage of your project.
Go meet other artists on forums and Discords. This is how you will grow as an artist, and you will make some contacts in the industry too.
Some great places on discord:
There's more out there, but those are the biggest I know.
Thank you for reading this and for having reached this part. I know it was a bit long, but I had "a lot" to say.
Thank you, Javier, for the invitation. It was a great opportunity for me to cover all my texturing workflow.
This article is from SEP 30, 2021 and was written for Game Art Blog. I'm posting it here because the Game Art Blog was shutdown.A lot of things like Tools, values and more have changed in my workflow since this article, I'm gonna do an updated article in the next months.